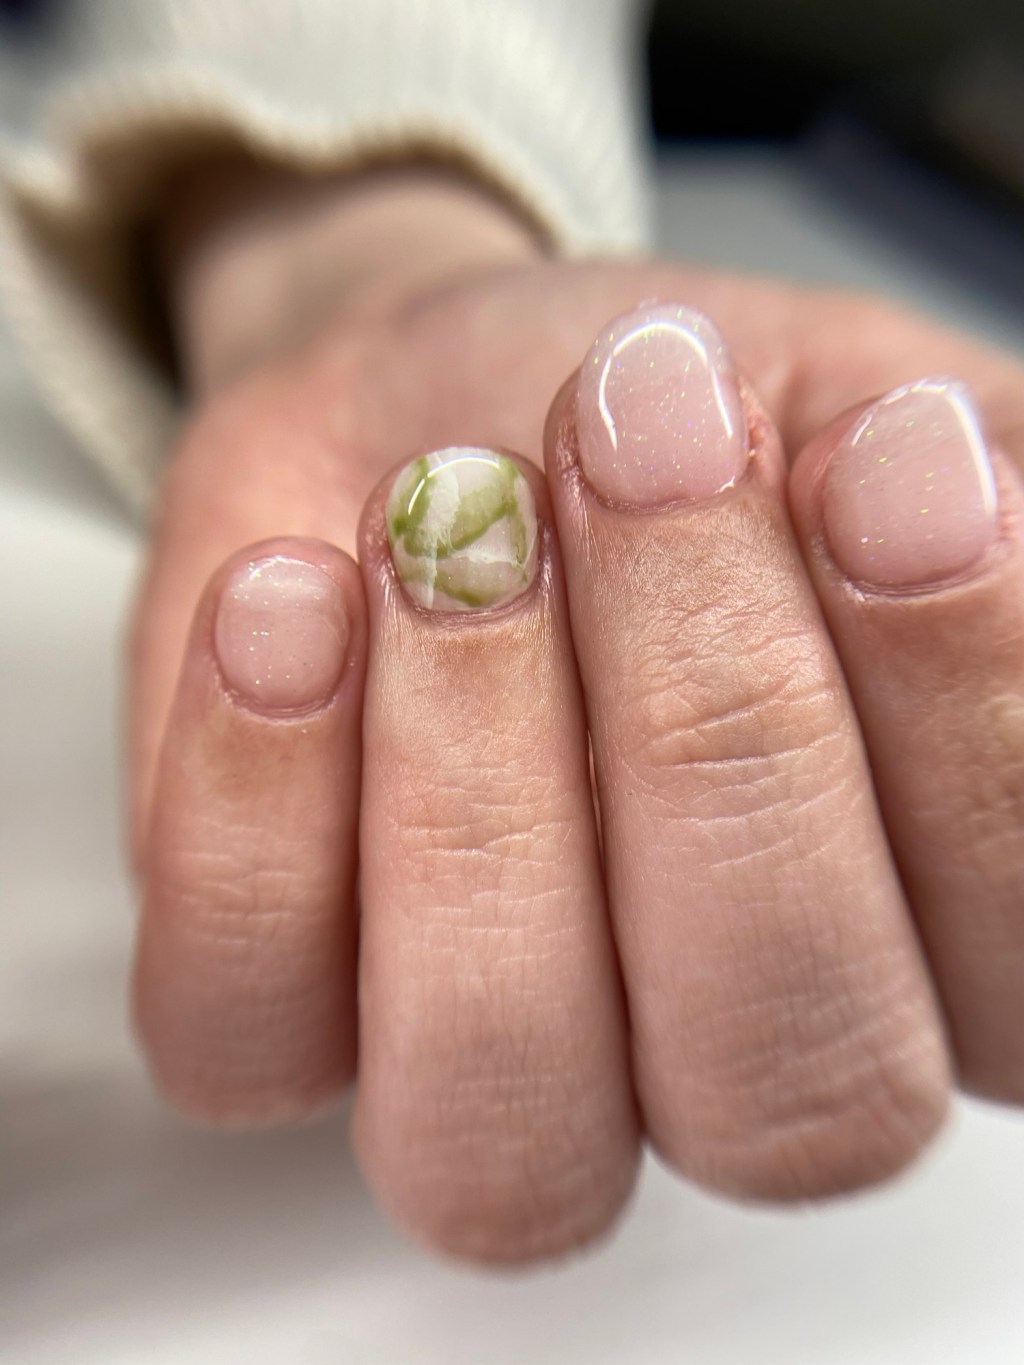
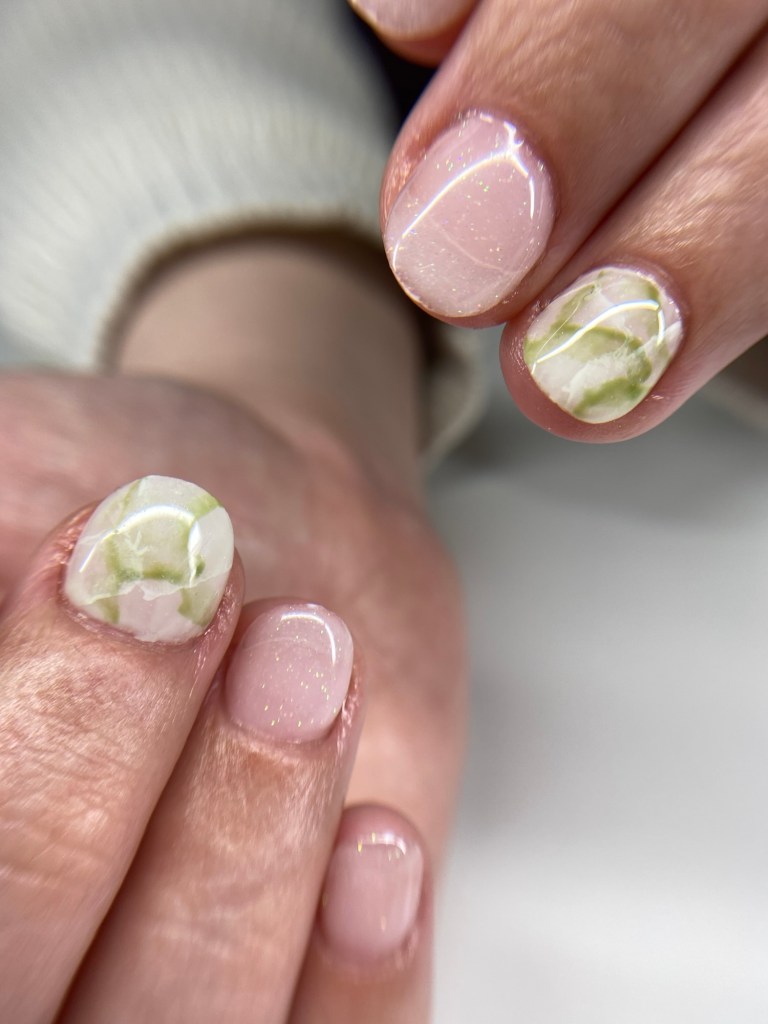
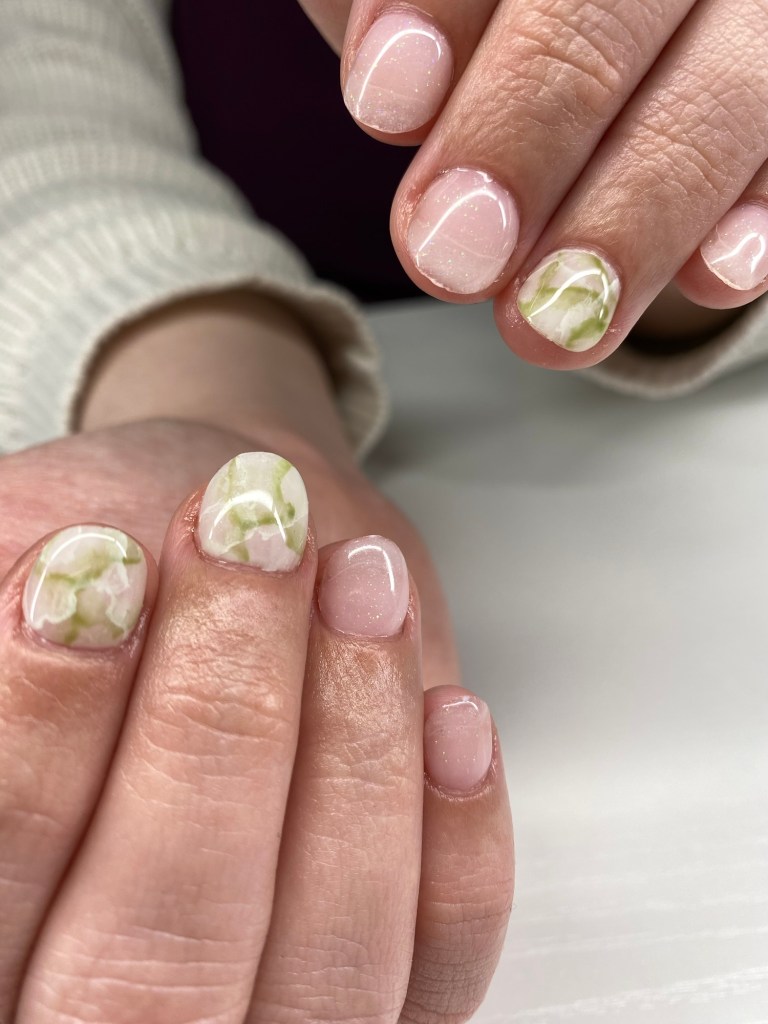
I’ve been seeing Jade nails all over IG and got so excited when my client requested it!
Watch the video tutorial here:
Jade Nail Art
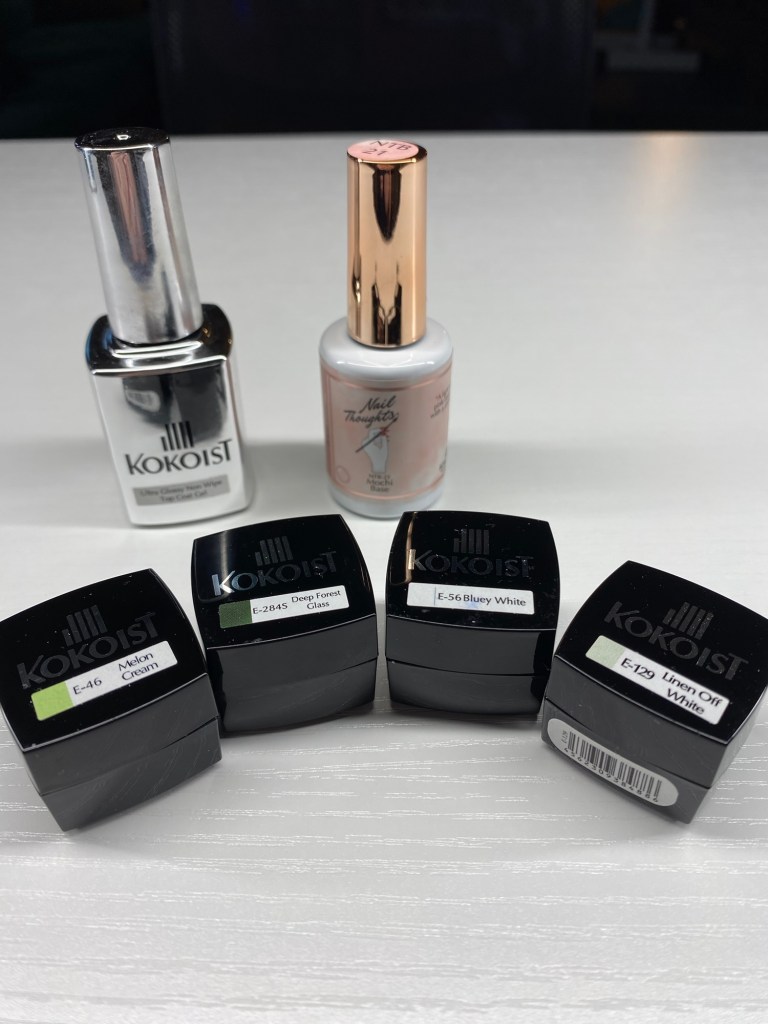
This look is heavy on the layering and even heavier on trusting the process. Here are the products I used:
From Kokoist:
Nail Thoughts Builder Base in Mochi
From Apres:
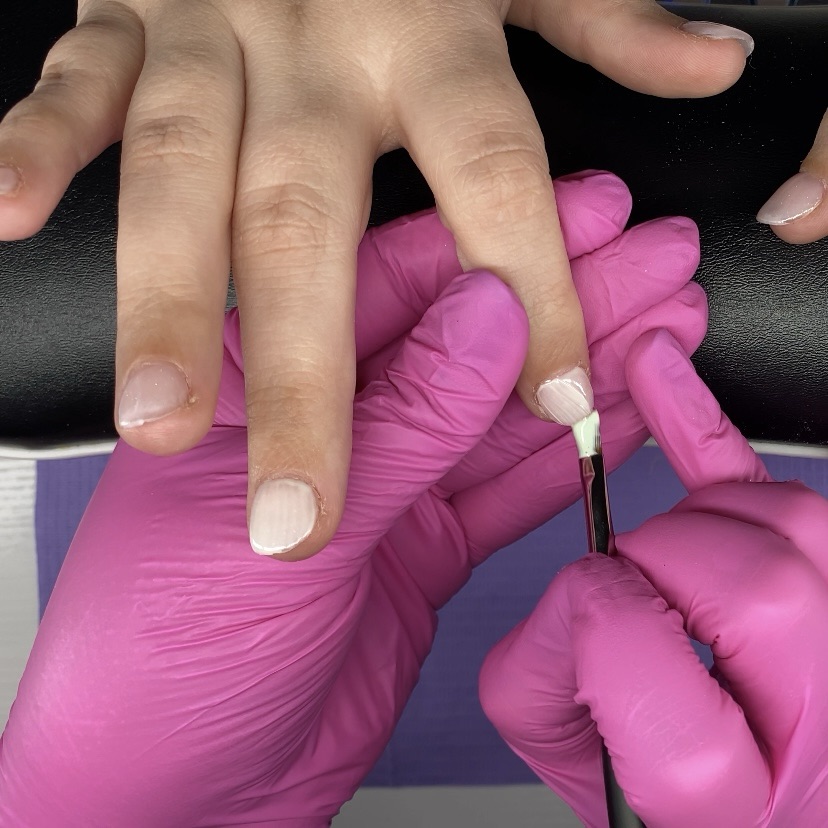
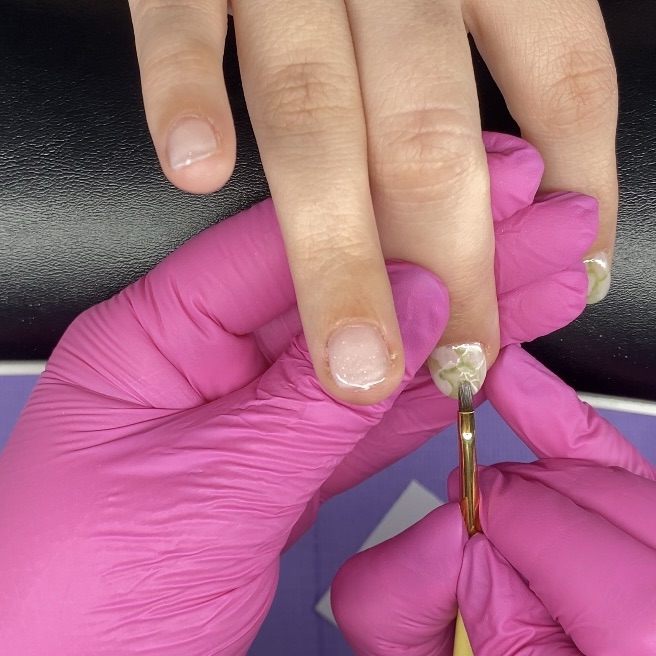
- Lay down whatever base you’re using, then use a sheer minty green color all over the area you are putting the jade design and fully cure for 60 seconds.
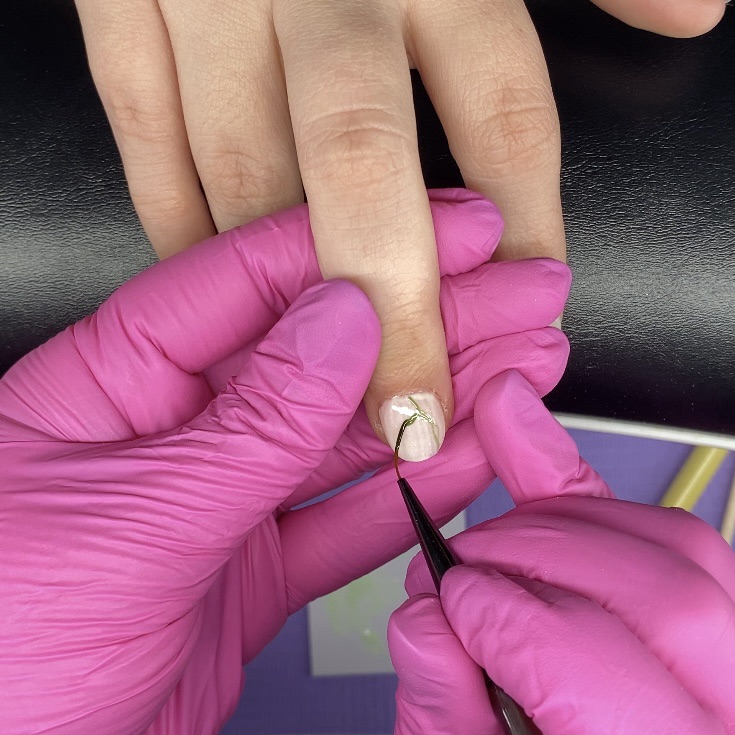
2. Using any liner brush, start making jagged, organic-looking lines with the deep forest green glass gel. I call these “low blood sugar lines” because I let my hand just draw unsupported so the shakiness gives a more natural look. Make an effort to paint each nail differently so it doesn’t look too uniform.
3. Using the Smoosh Brush (or any small flat top brush), start smudging in the lines. I like to almost push the edge of the line into itself so one edge is solid and the other edge is blurred. Leaving the inhibition gel layer un-wiped really helps with this blending part. Cure for 30-60 seconds.
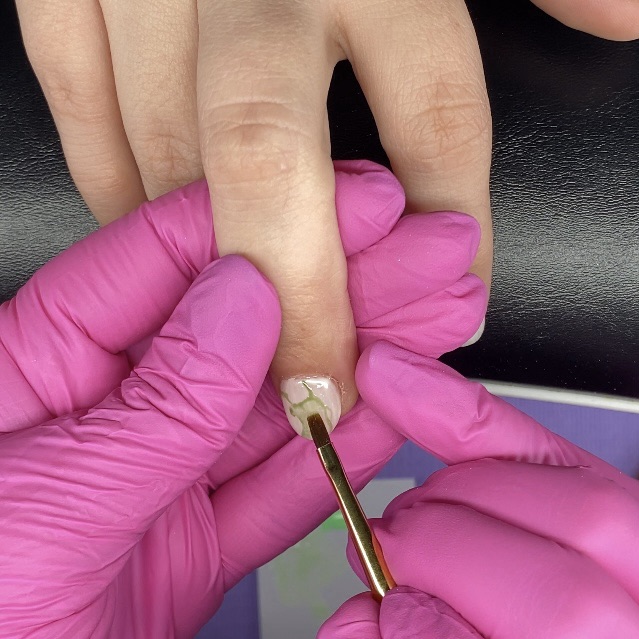
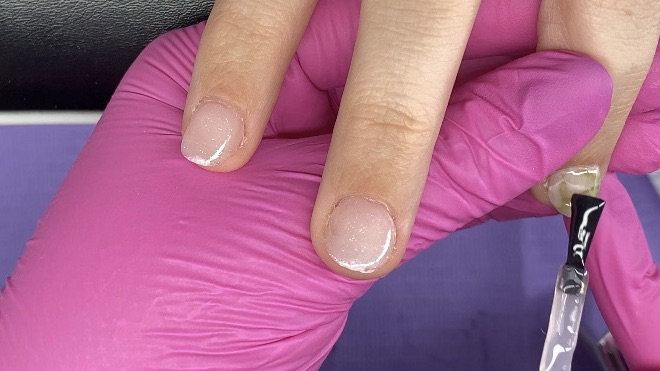
4. Mix a minty green, white, and sheer off-white color together if you don’t have one that’s the color you want. Start applying lines on top of the green lines, but not in the same pattern. Try not to fill up too much of the space so you can still see the pretty base underneath. Repeat step 3, then fully cure for 60 seconds.
5. Apply topcoat. I like to float my topcoat over the design and let it self level to a smooth, beautiful layer before fully curing for 60 seconds (if your client is sensitive and you happen to be using the Le Blanc Curing Lamp, use the 90 second setting to reduce the heat spike).
6. Finishing touches: I always finish off by wiping the inhibition layer off the top after fully curing. Fun fact… even no-wipe products have an inhibition layer that you have to wipe off as all gels leave a thin residue of uncured product on the top because of the oxygen exposure. Gotta love how products are named in a way that makes absolutely no sense, right? 😉
After wiping the inhibition layer off, I like to spray some of Topicals: Like Butter Hydrating Mist on the tops of my client’s hands, and apply cuticle oil. If you really want to go the extra mile, take a polishing ball bit for your e-file and very gently on a low speed, polish up and exfoliate the dead skin on the areas around the nail. This really helps to prevent hangnails!
I hope you try this out and let me know what you think! If you do, take a photo and tag me on Instagram (@letravailnailstudio)


Leave a comment